PWA and offline mode
In the previous part, I've wrapped up the initial work on the visualization and said I'd work on adding the offline mode. So here we go.
This part will cover two topics.
- Converting the app into a PWA (progressive web application).
- Adding offline mode.
Favicon
Well, perhaps you'd be wondering why I haven't added a favicon to the app before. I just figured there were more interesting things to talk about. With PWA in the mix, I do need an app icon, and this is a perfect opportunity to finally add a favicon.
The default favicon is, for historical reasons, a favicon.ico file. If one is
provided by the server, the browser will use it regardless of whether you
explicitly tell it to or not. Making a multi-resolution icon file that will work
well across different browsers is easy these days. There are online
tools that will do it for you. However, I also have another option:
SVG. Since virtually all of my application graphics are SVG, it makes the
workflow a bit simpler if I just use SVG for the favicon as well.
To add the icon to the app, I add the following to both index.html and
place.html:
<head>
    <!-- .... -->

    <link rel="icon" href="favicon.svg">
    <!-- .... -->
</head>
That's it.
The favicon now appears in the browser tab:

If you want to follow along, here's the file.
PWA conversion
To convert an app into a PWA, I need a manifest file. The one for this app looks like this:
{
"name": "A Weather App",
"short_name": "AWA",
"description": "A simple weather app",
"start_url": ".",
"display": "standalone",
"background_color": "#fff",
"theme_color": "#df0000",
"icons": [
{
"src": "favicon.svg",
"sizes": "any",
"type": "image/svg+xml"
},
{
"src": "favicon.png",
"sizes": "192x192",
"type": "image/png"
}
],
"screenshots": [
{
"src": "screenshot-wide.jpg",
"sizes": "1920x1152",
"type": "image/jpeg",
"form_factor": "wide",
"label": "Desktop version"
},
{
"src": "screenshot-tall.jpg",
"sizes": "644x1280",
"type": "image/jpeg",
"form_factor": "narrow",
"label": "Mobile version"
}
]
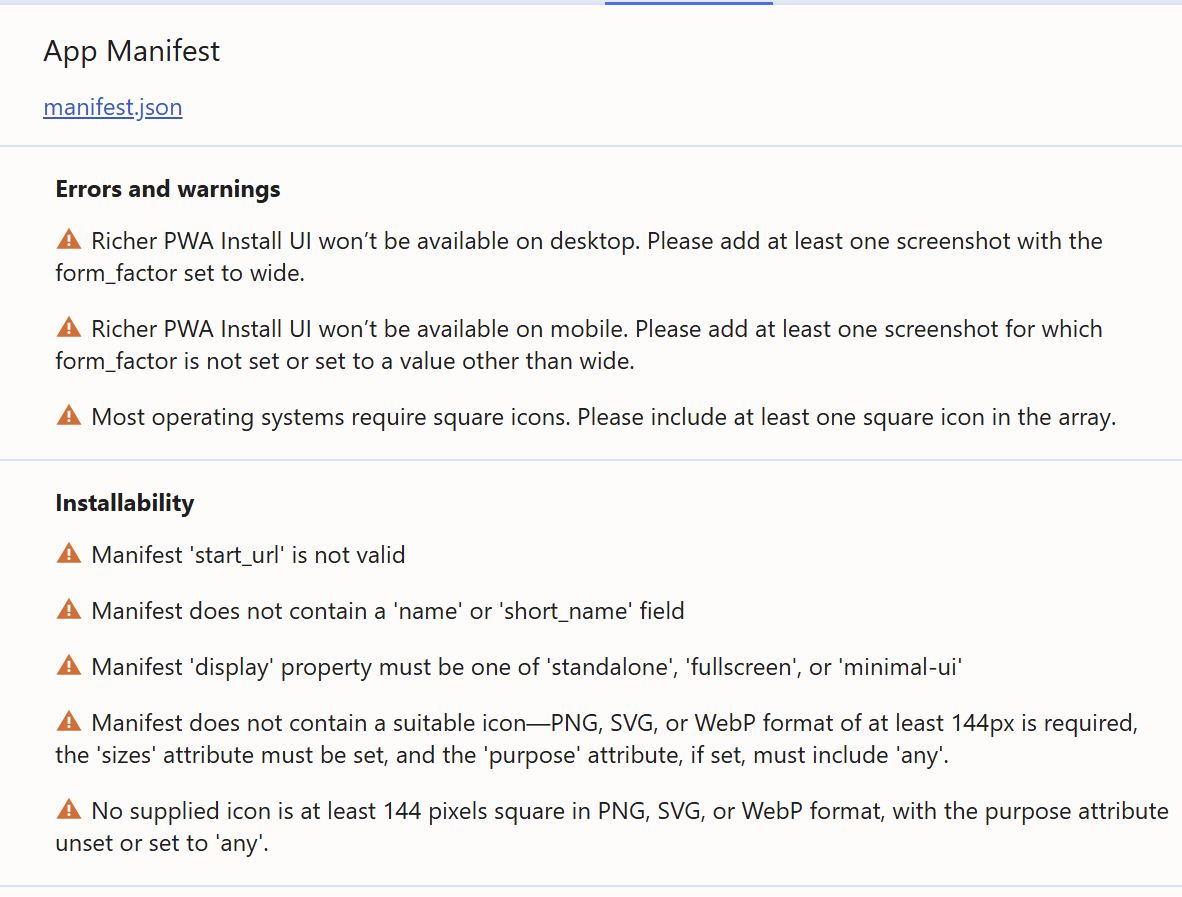
}I'm not going to bore you with the details. You can read up about it on the MDN if you are curious. Alternatively, you can start with a blank manifest file, and then open the Chrome developer tools (the "Application" tab) and follow the warnings it displays:
I'll just mention that I've set the start_url configuration to ., so that I
can host this app in a subdirectory of a site like I've done for this app.
(GitHub pages is another case where I'd need to do this.)
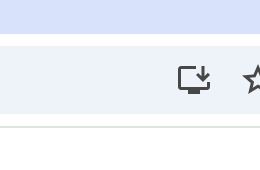
Once everything is correctly done, and there are no more warnings, the option to install the app appears. This option appears in different places depending on the browser.
The dialog to install the PWA is also different depending on the browser. Here's one example:
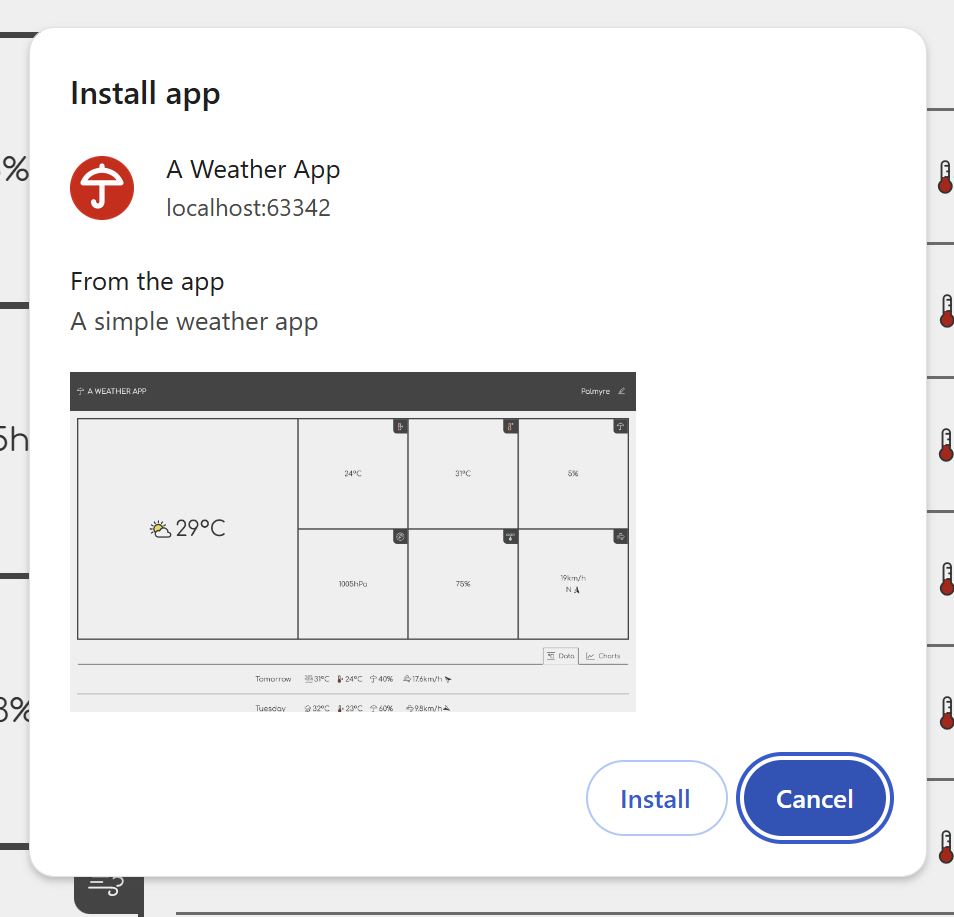
On mobile devices, this appears as "Add to home screen".
To cache the assets, I will add a service worker. I'll first add a file
service-worker.js and kick it off with version string and a list of assets:
let VERSION = '1',
    CACHE_FILES = [
        '.',
        'index.html',
        'index.css',
        'index.js',
        'place.html',
        'place.css',
        'place.js',
        'common.css',
        'common.js',
        'Comfortaa-Regular.woff',
        'Comfortaa-REgular.woff2',
        'icons.svg',
        'favicon.svg',
        'favicon.png',
        'manifest.json',
    ]
The version doubles as the cache name. Each version will have a separate cache name so that I can invalidate stale caches.
When registered, service workers go through different stages. The global self
object within the service worker is an event target that I can use to hook into
these stages and initiate various actions.
The first stage is install, which is when the browser receives a request
to register a new worker.
self.oninstall = ev => {
    ev.waitUntil(caches.open(VERSION).then(cache => cache.addAll(CACHE_FILES)))
}
The ev.waitUntil() call ensures that the service worker will
live long enough to complete the async operation started by
cache.addAll(CACHE_FILES). I create a cache with the same
name as the version, and add the listed assets.
The next stage is activation:
self.onactivate = ev => {
    ev.waitUntil(caches.keys().then(cacheNames =>
        Promise.all(
            cacheNames
                .filter(cacheName => cacheName != VERSION)
                .map(cacheName => caches.delete(cacheName))
        ),
    ))
}
The caches except for the one that matches the current VERSION are deleted.
This cleans up obsolete caches when the version number is bumped.
Lastly, I trap the fetch event to provide the cached result where available.
self.onfetch = ev => {
ev.respondWith(caches.match(ev.request).then(response =>
response || fetch(ev.request),
))
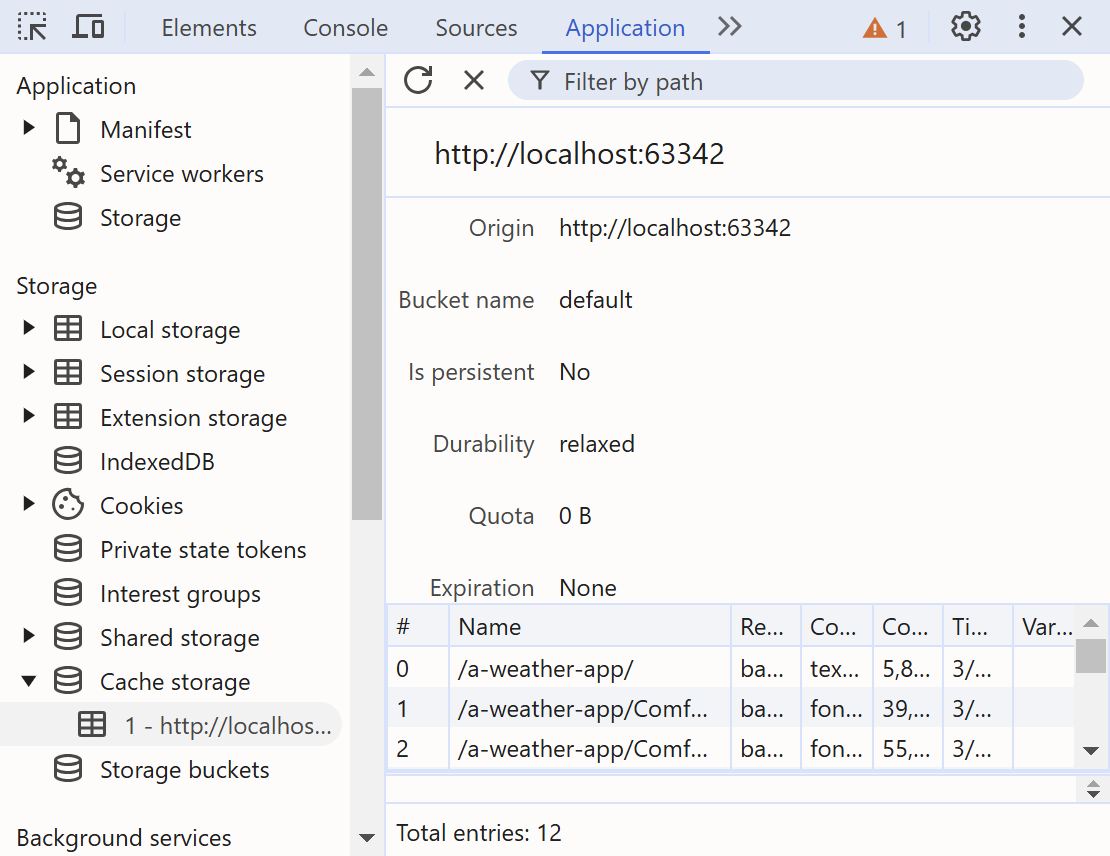
}Once I reload the page, I can verify that caching is working by using the Chrome dev tools.
The second way to see what the service worker is doing is to use the network tab. You should see a cog icon next to some of the assets now. If you look at the "Initiator" column, you'll see that those requests are initiated by the "service-worker.js" script. This tells you that the service worker is correctly intercepting the requests.

Offline mode
The offline mode is activated when the device has no Internet connection. If the data exists, it will be reused with a warning that it may be stale (e.g., current weather). When the device goes online, and it's showing stale data, it automatically reloads.
We generally have two kind of error condition: actionable and non-actionable. Actionable errors are those user can do something about. Failure to connect to a remote server can either be actionable or non-actionable. If the Internet connection is down, then the user can check the Internet connection. If the server is down, then there's nothing the user can do. Either way, I need to be able to differentiate between these conditions in the application code.
Although caching in the service worker is convenient, it's not guaranteed to
exist at runtime – it may take a while to install and activate. Because of
this, I'm going to implement a simple LocalStorage-based caching.
First, I'm going to add the caching mechanism to the getWeatherData():
let /* .... */
    getWeatherData = (handleError, handleSuccess) => {
        if (!cachedData) {
            let /* .... */
                cacheKey = `${selectedPlace.lat}:${selectedPlace.long}`,
                putCachedData = data => {
                    localStorage.forecastData = JSON.stringify({...data, cacheKey, cachedAt: Date.now()})
                },
                getCachedData = () => {
                    let data = JSON.parse(localStorage.forecastData || 'null')
                    if (!data || data.cacheKey != cacheKey) throw Error('bad response')
                    return data
                }

            // ....
        }
        // ....
    }
In one of the past parts, I insisted that the only good reasons to factor
something out are code reuse and clarity. The putCachedData() falls under
'clarity'. By bringing the single line closer to getCachedData() I make it
easier to observe the stored structure and determine whether getCachedData()
is retrieving it correctly. This is always a good idea, but it becomes critical
when working on large files.
Before I can use the cached data, I need to determine whether it matches the place selected by the user. For this I need to create a cache key based on that information, store that in the cache, and compare later when retrieving it. I'm using the coordinates as the cache key as a proxy for uniquely identifying a place. Though convenient, I don't use the URL as the key because it includes the date, and that would cause the cache to automatically expire as soon as the date changes – not my intent.
When actually fetching the data, I first check if the browser is offline, and hit the cache if it is. When the browser is online, I proceed to fetch().
As it turns out, browsers don't necessarily report when the host OS is offline.
I'm not 100% sure how it works, but toggling network connectivity simply doesn't
reflect in in the navigator.onLine property. As a fallback, I'm hitting the
cache when fetch() throws an exception. In a vast majority of cases, fetch()
throws when the server is unreachable. This could technically mean the service
rather than Internet outage, but I can't be too picky as the alternative would
mean pinging a random known host online on interval, which would be wasteful.
let /* .... */
getWeatherData = (handleError, handleSuccess) => {
if (!cachedData) {
// ....
if (!navigator.onLine) cachedData = Promise.resolve().then(getCachedData)
else cachedData = fetch(url)
.then(
res => {
if (!res.ok) throw Error('bad response')
return res.json().then(data => {
putCachedData(data)
return data
})
},
() => getCachedData(),
)
}
// ....
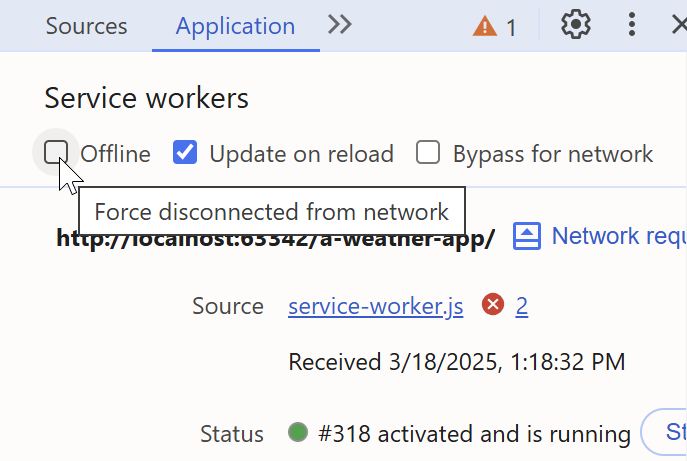
}To test whether the cache works, I can toggle the offline mode from the Chrome dev tools' Application tab, under Service Worker.
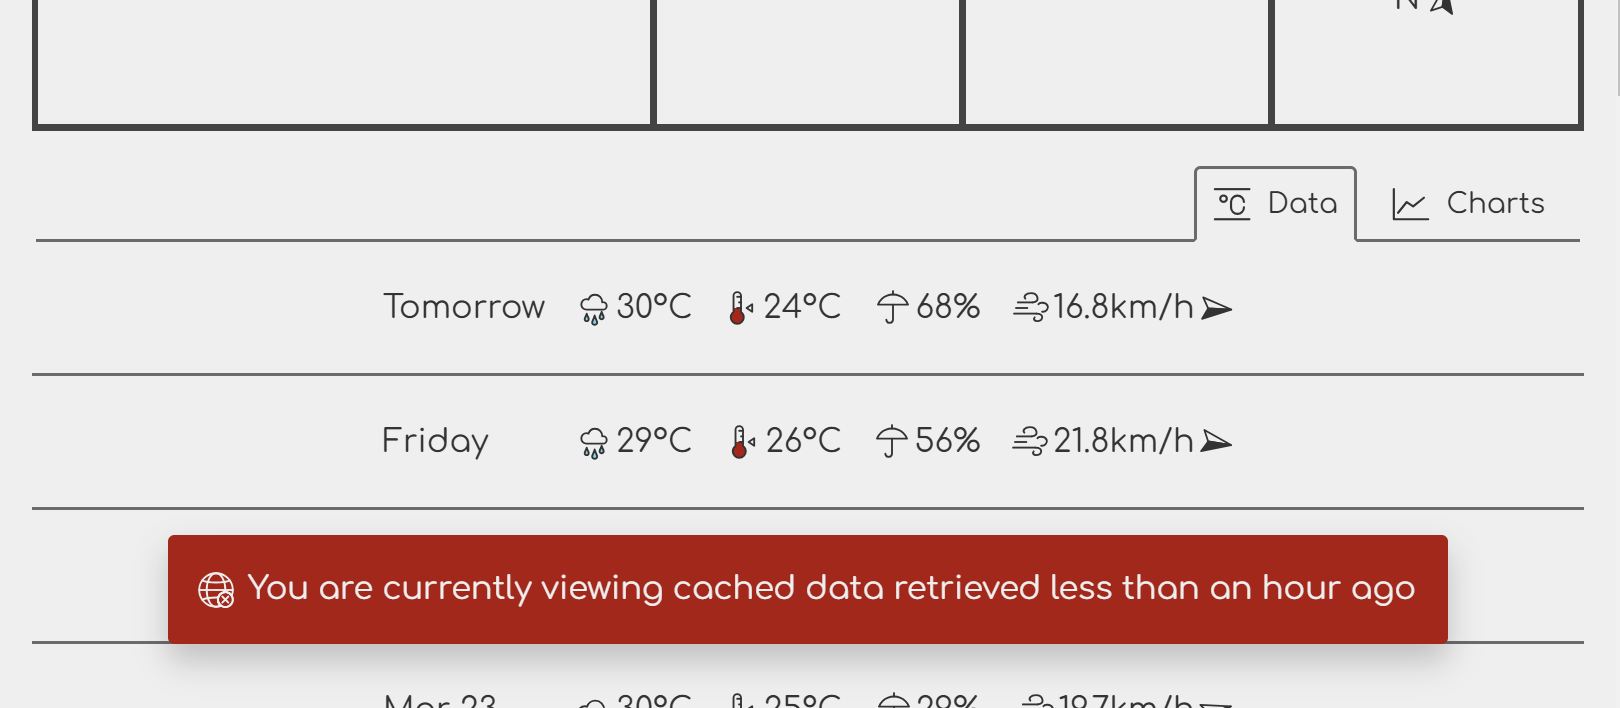
I need a way to indicate that stale data is shown. To keep things simple, I'll add a banner at the bottom that shows this information while the app is offline.
As always, I'm staring with the markup. It looks like this:
<main>
    <!-- .... -->

    <x-network-condition>
        <p aria-live="polite"></p>

        <template data-name="disconnected">
            <x-icon name="disconnected"></x-icon>
            <span>
                You are currently viewing cached data retrieved <span class="cache-time"></span>
            </span>
        </template>
    </x-network-condition>
</main>
The aria-live="polite" on the paragraph element marks the element as a
live region. If the user uses a screen reader, any content that is added to
this element will be announced almost immediately.
For styling, it's the usual: little toast that appears at the bottom of the page. I also need to make room for the content at the bottom of the page, so that the toast banner doesn't obscure the last row of the forecast table.
main {
    /* .... */
    padding-bottom: 6em;
}

x-network-condition p {
    display: flex;
    gap: 0.5em;
    align-items: center;
    padding: 1em;

    border-radius: 0.2em;
    background: var(--alert-color);
    color: var(--secondary-text-color);
    box-shadow: 0 0.5em 1em rgba(0, 0, 0, 0.2);
    line-height: 1.4;
    transition: transform 0.5s;
}

x-network-condition p:empty {
    transition: none;
    transform: translateY(calc(100% + 2em));
}
I'm using the :empty selector to move the paragraph out of sight when it's...
well, empty. This saves me the trouble of performing additional DOM
manipulation after I set the content.
The reason I add transition: none, is just laziness. It's a quick and
dirty hack to avoid a weird situation where the content is removed first
and then translated downwards. It looks janky and not cool at all.
Completely disabling transition makes it go away immediately. This doesn't
prevent the animation in the other direction.
Btw, in case you're wondering, you can already test this CSS-implemented
behavior by manually manipulating the <p aria-live="polite"> element either in
the JavaScript console or directly in the Elements tab of the developer tools.
To make it not empty, simply add some content to the element. You should see the
element pop into the view. Like this:
document.querySelector('x-network-condition p').textContent = 'Test'It's not necessary to wait until your JavaScript is all done before testing this.
This is one of the reasons I think CSS-in-JS, atomic CSS, and similar inline or
class-based CSS solutions are counter-productive: they just slow things down –
contrary to common belief – by requiring you to have more fully implemented
solutions before you can check whether your CSS does what you want. (Well, slow
you down if you know what fast looks like, I guess.) It also doesn't help that
some of these solutions don't let you use useful shortcuts like :empty to save
you some JavaScript to begin with.
Speaking of JavaScript, the implementation of the <x-network-condition>
element looks like this:
customElements.define('x-network-condition', class extends CustomElement {
    setup() {
        let message = this.querySelector('p'),
            networkWarningMessageTemplate = this.querySelector('[data-name=disconnected]')

        // ....

        let displayNetworkConditionWarning = data => {
            if (!data.cachedAt) message.replaceChildren()
            else requestAnimationFrame(() => {
                let cacheTime = formatRelativeTime(new Date(data.cachedAt)),
                    messageContent = networkWarningMessageTemplate.content.cloneNode(true)
                messageContent.querySelector('.cache-time').textContent = cacheTime
                message.replaceChildren(messageContent)
            })
        }

        if (selectedPlace)
            getWeatherData(() => {}, displayNetworkConditionWarning)
    }
});
The error handler in the getWeatherData() call is a blank function that
doesn't do anything as I'm not interested in that condition. Errors are already
indicated elsewhere. I'd like to point out that it's possible to manipulate the
cloned template content before inserting into the DOM. This ensures that the
message is inserted in one go, reducing the possibility of confusion on the part
of the screen readers.
When the data isn't cached, the code will clear the contents of the message container. This is going to be useful when handling online-offline toggle later.
Earlier, I omitted a portion of the code related to formatting the interval to minimize distraction. Here it is:
customElements.define('x-network-condition', class extends CustomElement {
    setup() {
        // ....

        let dayInSeconds = 24 * 60 * 60,
            hourInSeconds = 60 * 60,
            relativeFormat = new Intl.RelativeTimeFormat('en', { numeric: 'auto' }),
            formatRelativeTime = date => {
                let secondsAgo = Math.round((date - new Date()) / 1000)

                if (secondsAgo >= dayInSeconds)
                    return relativeFormat.format(Math.floor(secondsAgo / dayInSeconds), 'day')
                if (secondsAgo >= hourInSeconds)
                    return relativeFormat.format(Math.floor(secondsAgo / hourInSeconds), 'hour')
                return 'less than an hour ago'
            }

        // ....
    }
})
The formatRelativeTime() uses the Intl API to format values
like (-2, 'day') to 2 days ago. In this particular case, it's unnecessary to
handle longer time spans like weeks, months, or years, as it's not very likely
that the user would go that long without Internet. Maybe a few days off-grid
while camping or something. Similarly, there's no need to handle periods shorter
than an hour.
This kind of function exists in many date/time-related libraries. Why would I write my own then? The reasons are straightforward:
- I don't need all the other features present in such libraries.
- I don't even need all the features that such functions have. For instance,
I don't need cases like
2 hours and 4 minutesor2 weeks ago. I'd be pulling in cases that are unnecessary for my function, causing bloat. - (For me) it's a relatively low-effort affair. It's also the kind of function AI will very likely get right in one go even if I don't necessarily feel like writing it by hand.
When I disconnect my machine from the Internet, here's what I get:
Getting back online
It would be good if the message would clear on its own when the machine goes back online. So I'm doing that next.
When the browser goes online or offline, the online or offline event,
respectively, fires on the window object. Another thing I know is that all
parts of the application will invoke the same getWeatherData() function. Put
the two together, and I get that the best place for the event handler is in
getWeatherData(). That would add this feature to all pieces of code that
invoke this function.
let /* .... */
    getWeatherData = (handleError, handleSuccess) => {
        // ....

        window.addEventListener(navigator.onLine ? 'offline' : 'online', () => {
            getWeatherData(handleError, handleSuccess)
        }, {once: true})

        return cachedData.then(handleSuccess, handleError)
    }
Whenever the getWeatherData() function is called, a recursive call is
scheduled to execute the next time the network connection state changes. I use
the {once: true} option to prevent duplicate execution, and the
navigator.onLine ? 'offline' : 'online' ensures that I alternate between the
network states when the state changes.
This modification by itself doesn't quite work. Why? Because the data is cached.
Simply calling getWeatherData() will actually not do anything. To fix this,
I'm adding a separate set of online and offline event listeners globally
that will invalidate the cache. Because the event listeners are called in
the order in which they are added, I must ensure that this one is added
before any code has had the chance to call getWeatherData(). The best
place for this is right after the getWeatherData() declaration.
let /* .... */
    getWeatherData = () => {
        // .....
    }

window.addEventListener('online', () => cachedData = null)
window.addEventListener('offline', () => cachedData = null)
Incidentally, this design is possible because getWeatherData() uses the
continuation-passing style (CPS) – it takes callbacks that handle the
continuation of an async operation, rather than returning a promise or some
other mechanism. Thanks to this design, the function retains control over when
the callbacks are invoked, allowing me to invoke them multiple times in response
to connection state changes.
As before, I can use the "Offline" toggle in the dev tools (under the Application tab, Service workers section), to test whether this mechanism is working correctly.
Also as before, this may or may not actually work in real life due to flaky OS/browser support. Why am I leaving it in then? Because it's nice UX enhancement for those fortunate enough to be on a good platform-browser combination, and it doesn't break essential features or degrade the UX when it doesn't work – a.k.a. progressive enhancement.
Conclusion
In this part, I've covered the PWA conversion and the offline mode. I've also
shown you how to use the Intl API to do some time interval formatting.
In the next part, I'm going to work on making the weather summary more interactive by allowing the user to organize the tiles and change the data being shown.
Let me briefly touch on some payload stats across two pages:
- HTML: 8k
- CSS: 15.5k
- JavaScript: 22.7k
As a reminder, this is all unminified code, complete with comments and whitespace. I'm just throwing the numbers out there. You decide what they mean. 😉
As usual, the live version is online.